About a year ago, I found myself on the hunt for energy meters compatible with my power distribution box and stumbled upon Vue 2 by Emporia Energy. This device, with its support for three primary phases and 16 individual subnets, intrigued me. One of its compelling features is the use of convenient current transformer (CT) sensors, enabling a hassle-free attachment of all sensors without any need for wire exposure or disconnection.
Intrigued by the device’s potential and the sufficient number of channels it offered, I proceeded to purchase it (which, in retrospect, just about met my requirements). Installation within my circuit breaker box, typically large and well-routed in Germany, was straightforward, providing enough room for the current clamps. The installation was followed by an introduction to the accompanying app that impressively displayed real-time power consumption along with various statistical data. Its responsiveness made it an adequate tool to use. Although still being a cloud-based service (i.e. your data on someone else’s computer)
After installation, and some initial exploration of its functionalities, I grew curious about how I might extract the data it captured and incorporate it into my home assistant setup. Eventually there was a python plugin for home assistant which fetches the values fromthe Emporia Energy’s web-API. Not what I wanted. I do not want to rely on cloud services and on python scripts, pulling my data back from the clouds…
I started reverse engineering the ESP32 firmware image and found some interesting things – I will share them later when they are fixed. Reversing ESP32 assembly code does not make a lot of fun btw.
Stumbling the web, I came across to some great reverse engineering story with nearly all information you would need and also an ESPHome fork which added support for this device. Although I did not want to touch ESPHome, I gave it a try, set up a docker container and wanted to configure the firmware for my 3-phase system. Took me 20 minutes, then I rolled it back and wanted to develop my own firmware. I do in general not get comfortable with ESPHome and probably never will. I want raw source and full access, building an own firmware with all the tweaks I want to have in it. Not a ready-to-run, YAML based, static configuration and some very limited firmware.
As this would take some time and I didn’t want to tinker with the only Vue I have, it took some time until I bought another one from Kleinanzeigen. It was not the cheapest, but It was time to start this project already.
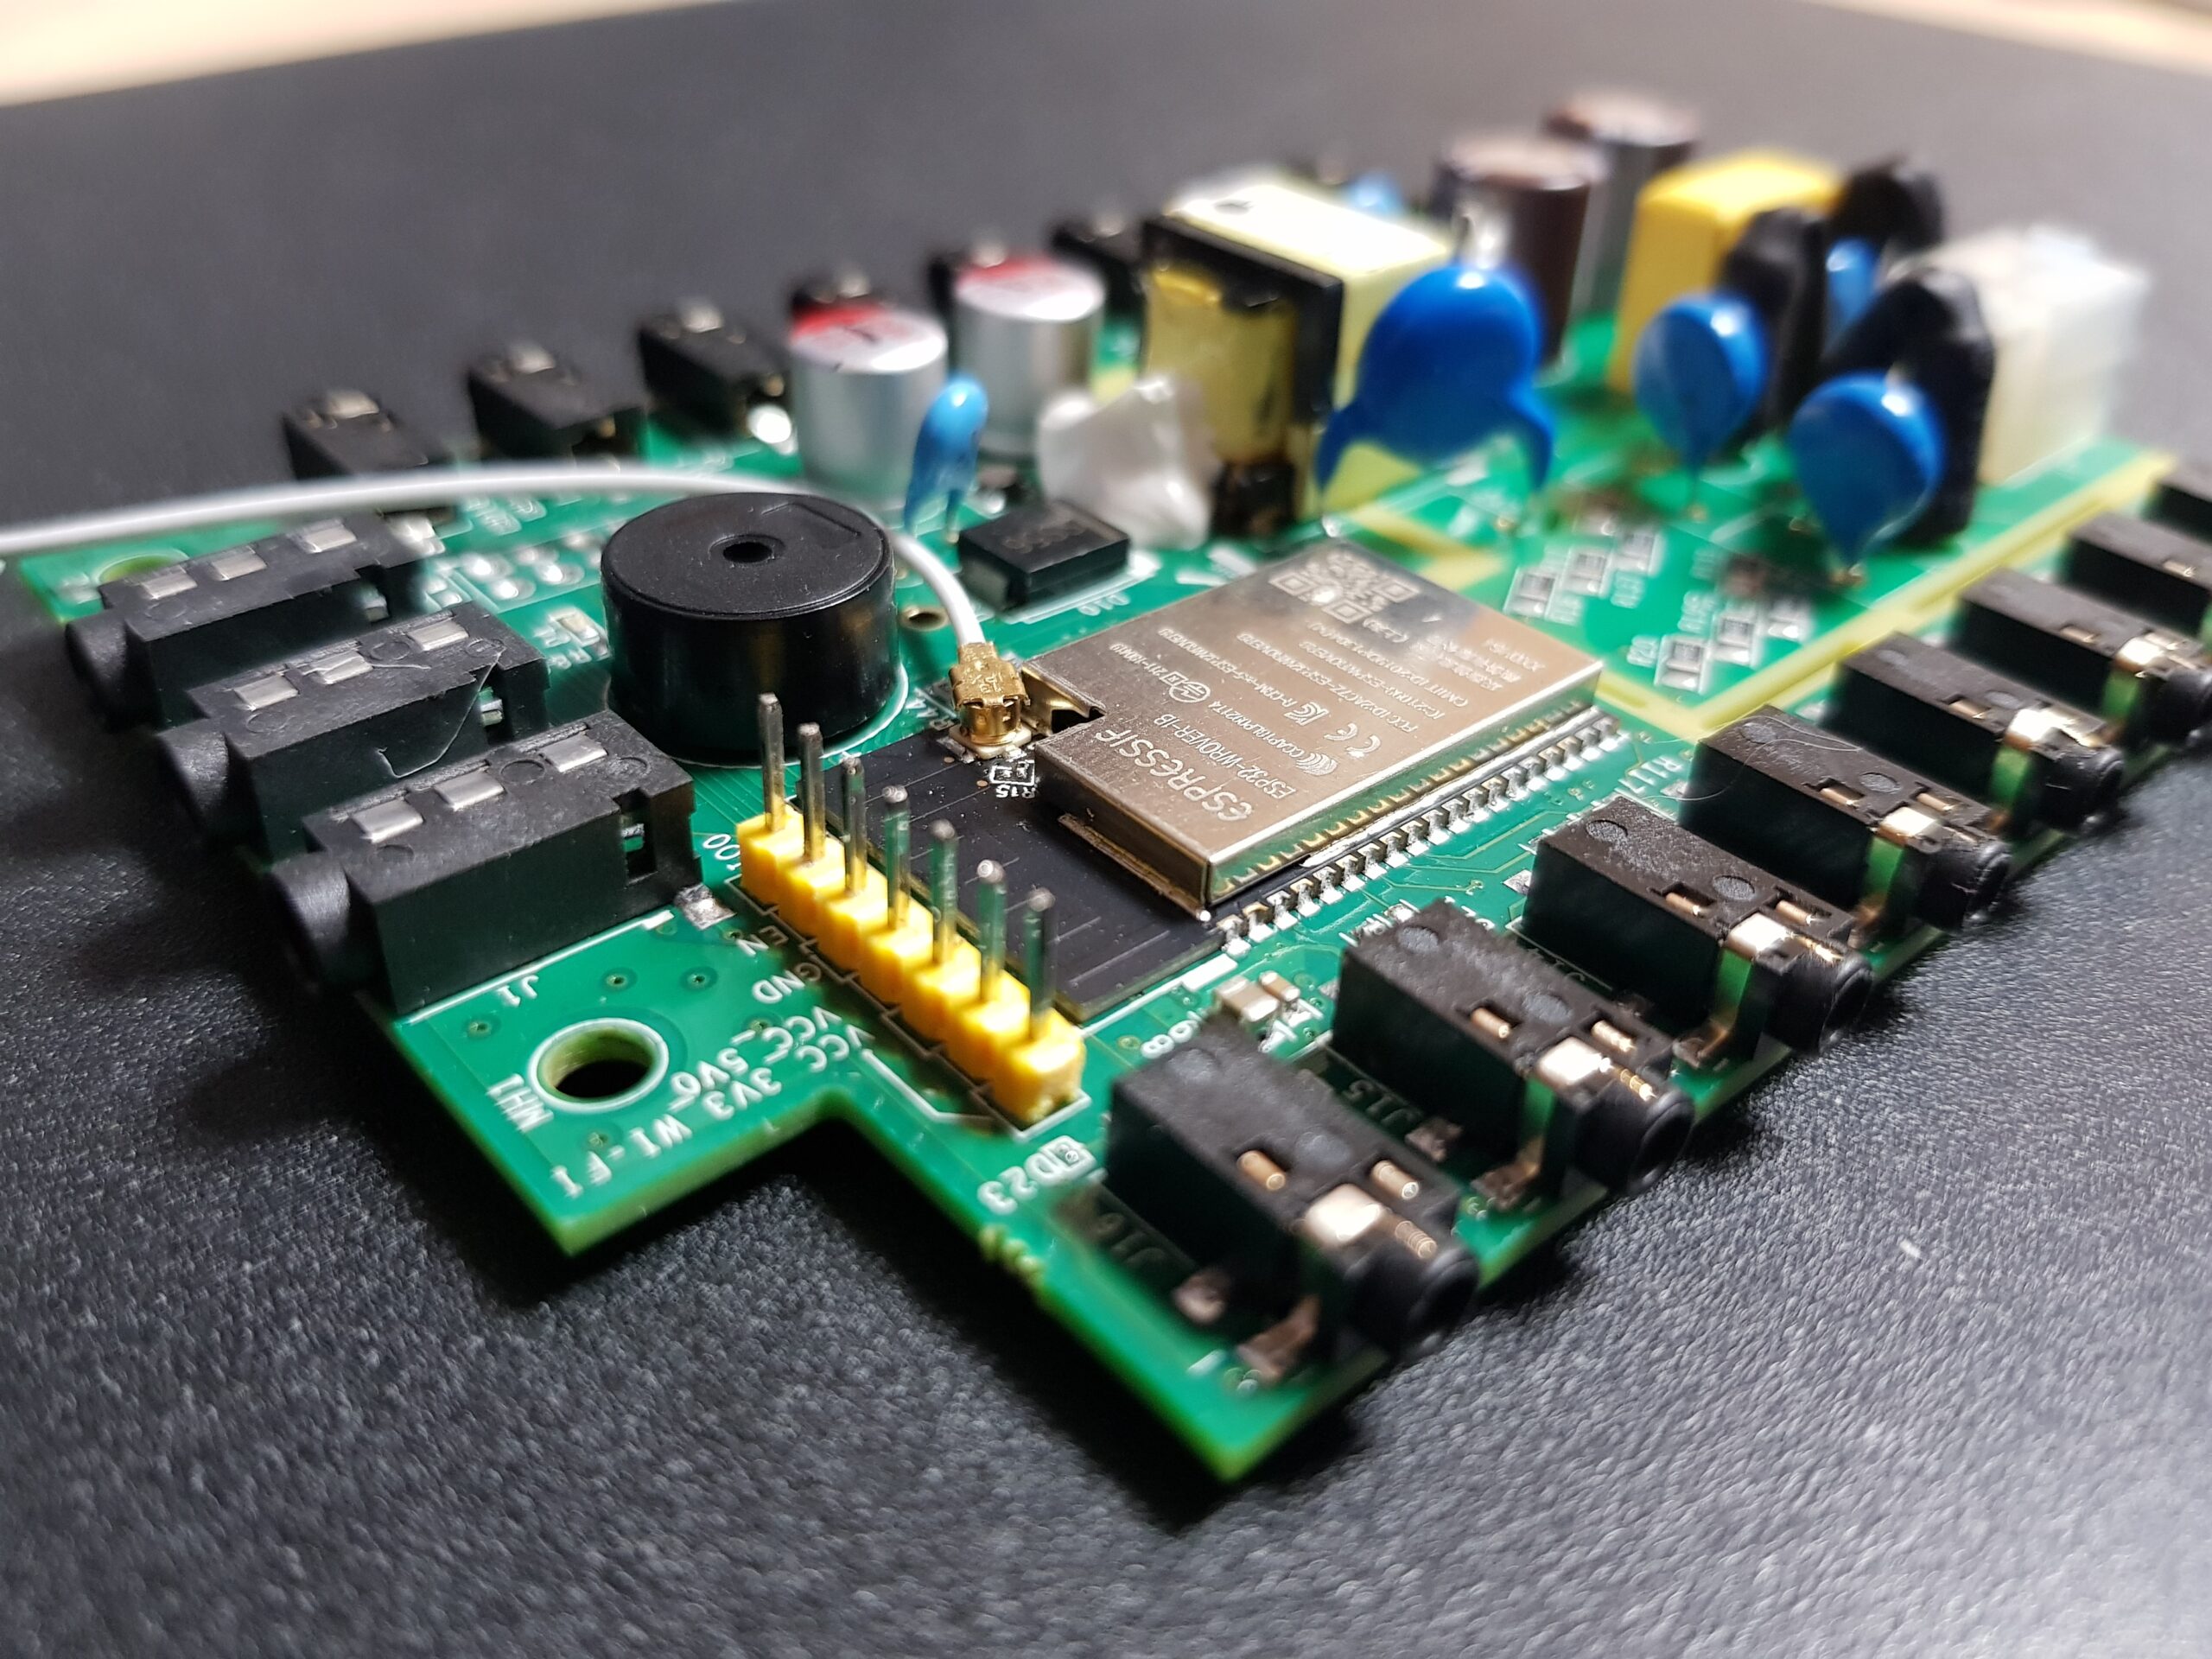
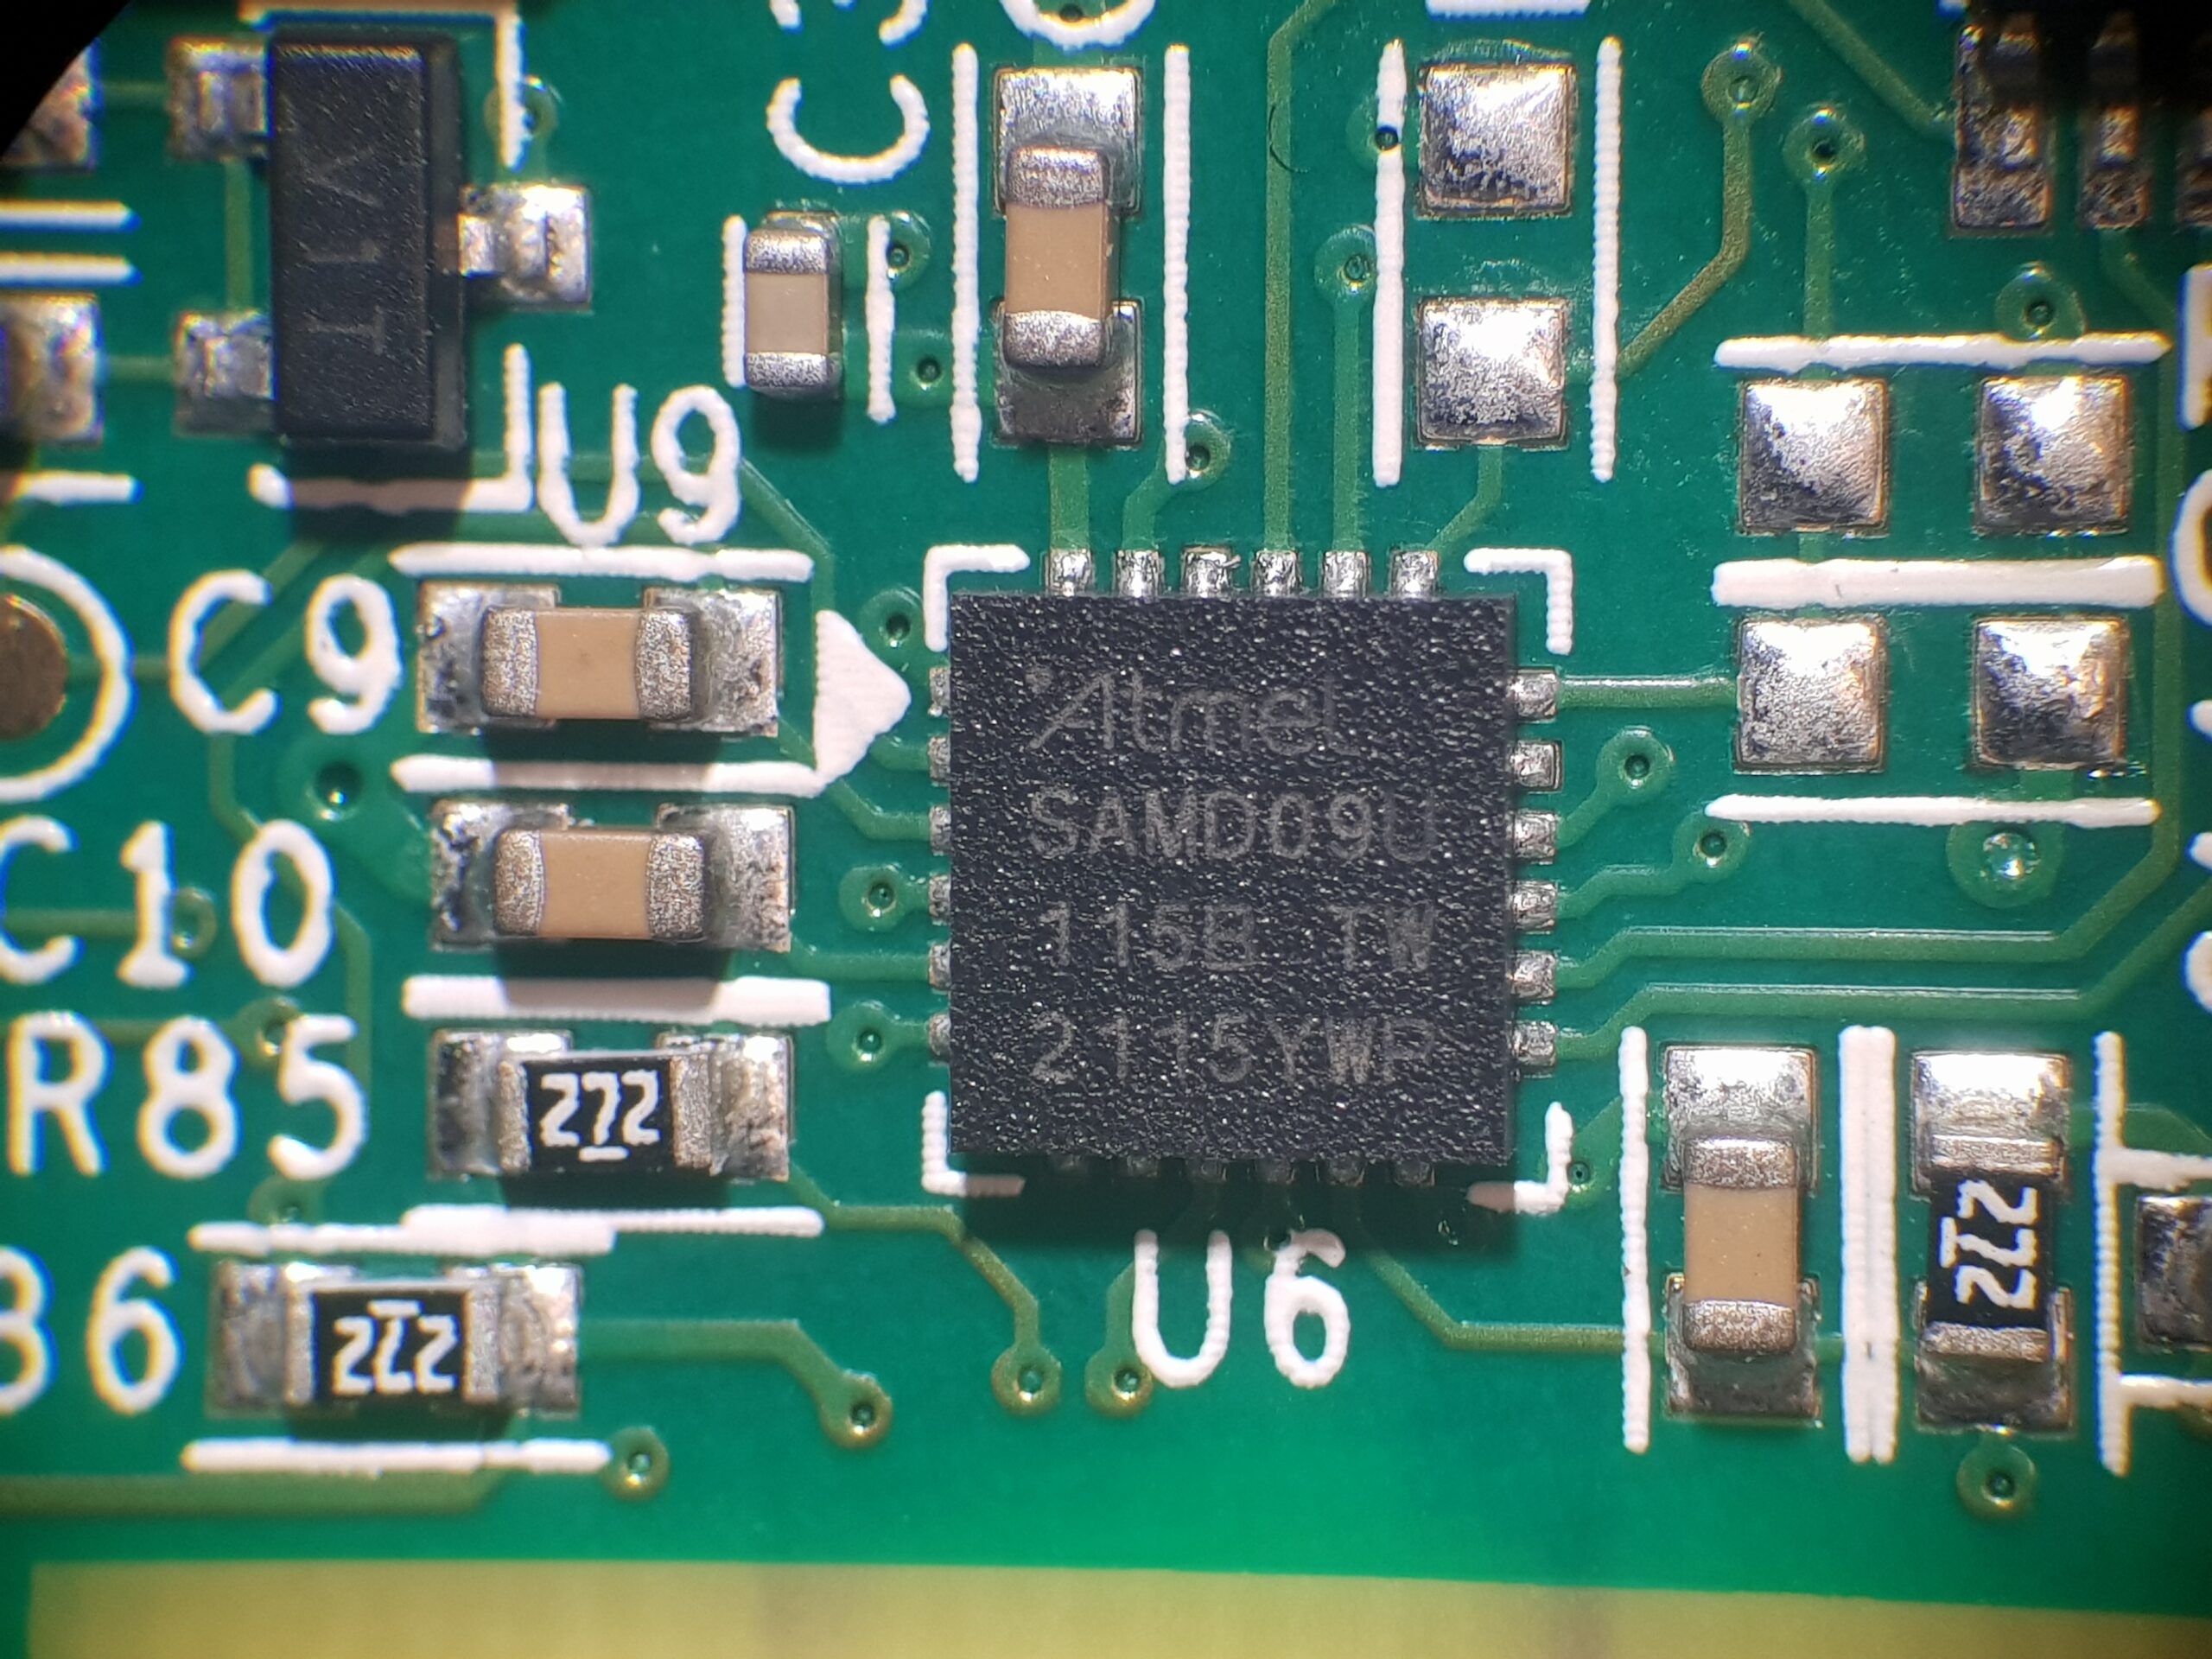
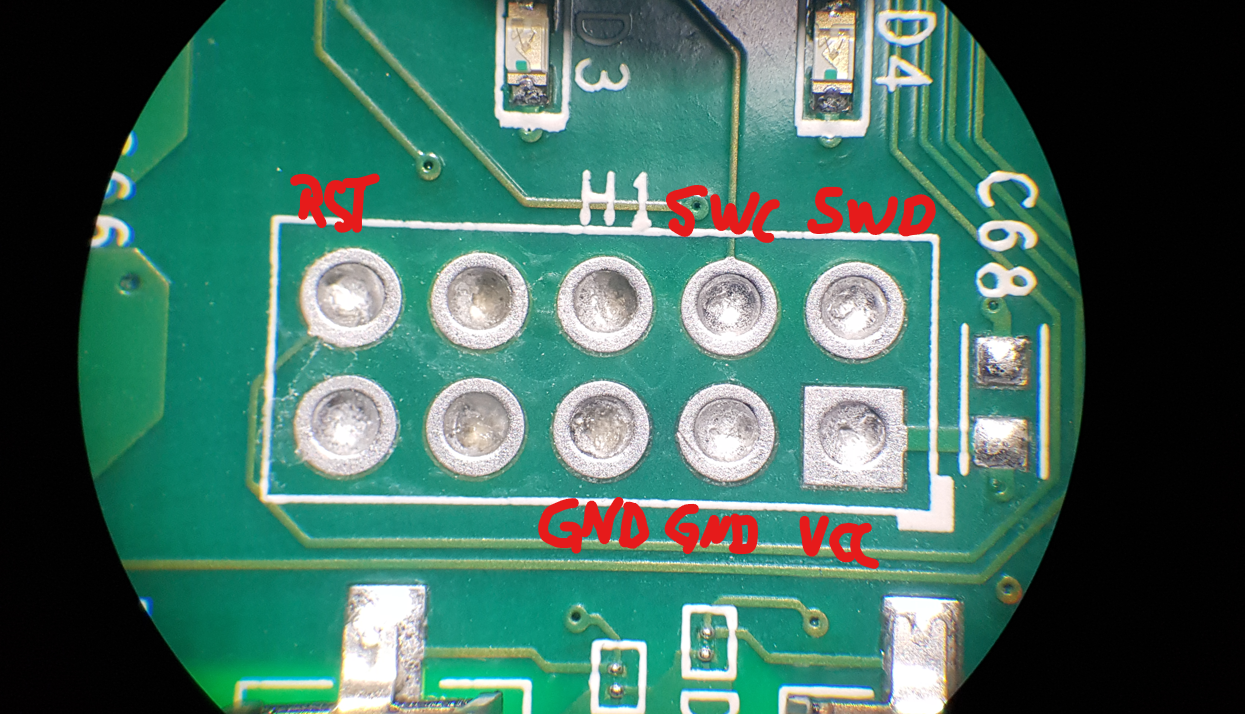
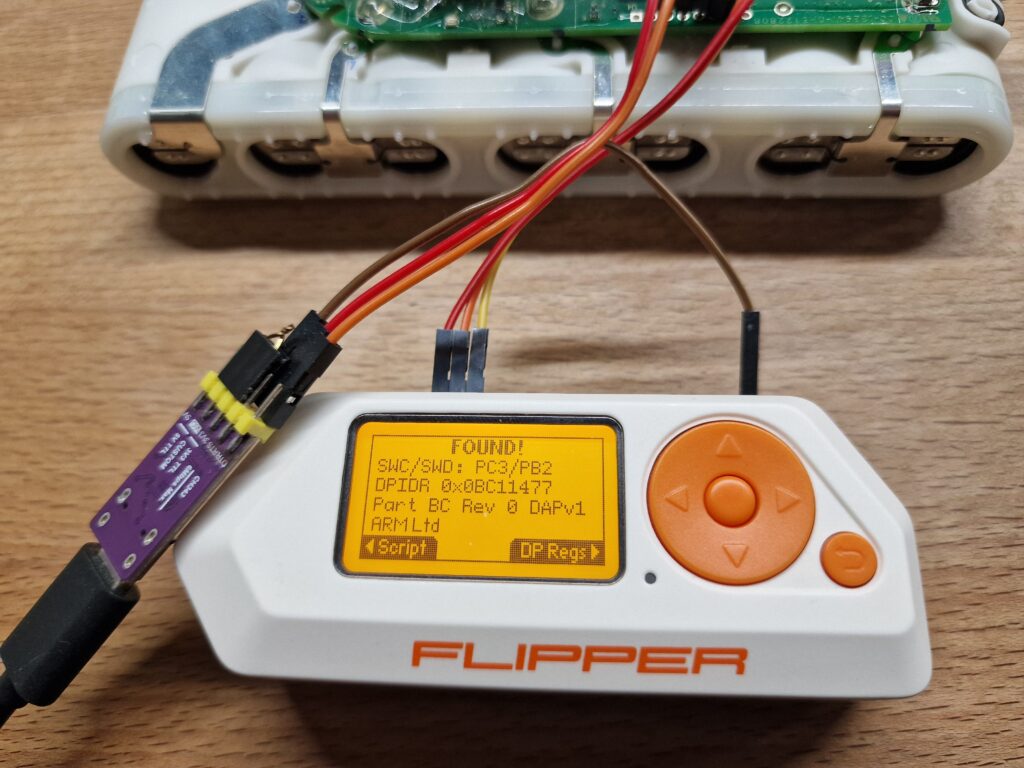
On this PCB is another small µC, an Atmel SAM-D09 which seems to do all the workload and is accessible via I²C, responding with a 284 byte blob, containing all the measurements. I am intrigued to test if my Flipper Zero SWD Probe App can work with it. Some guy over at the ESPHome project already started reverse engineering just while I was preparing this post. What a timing…
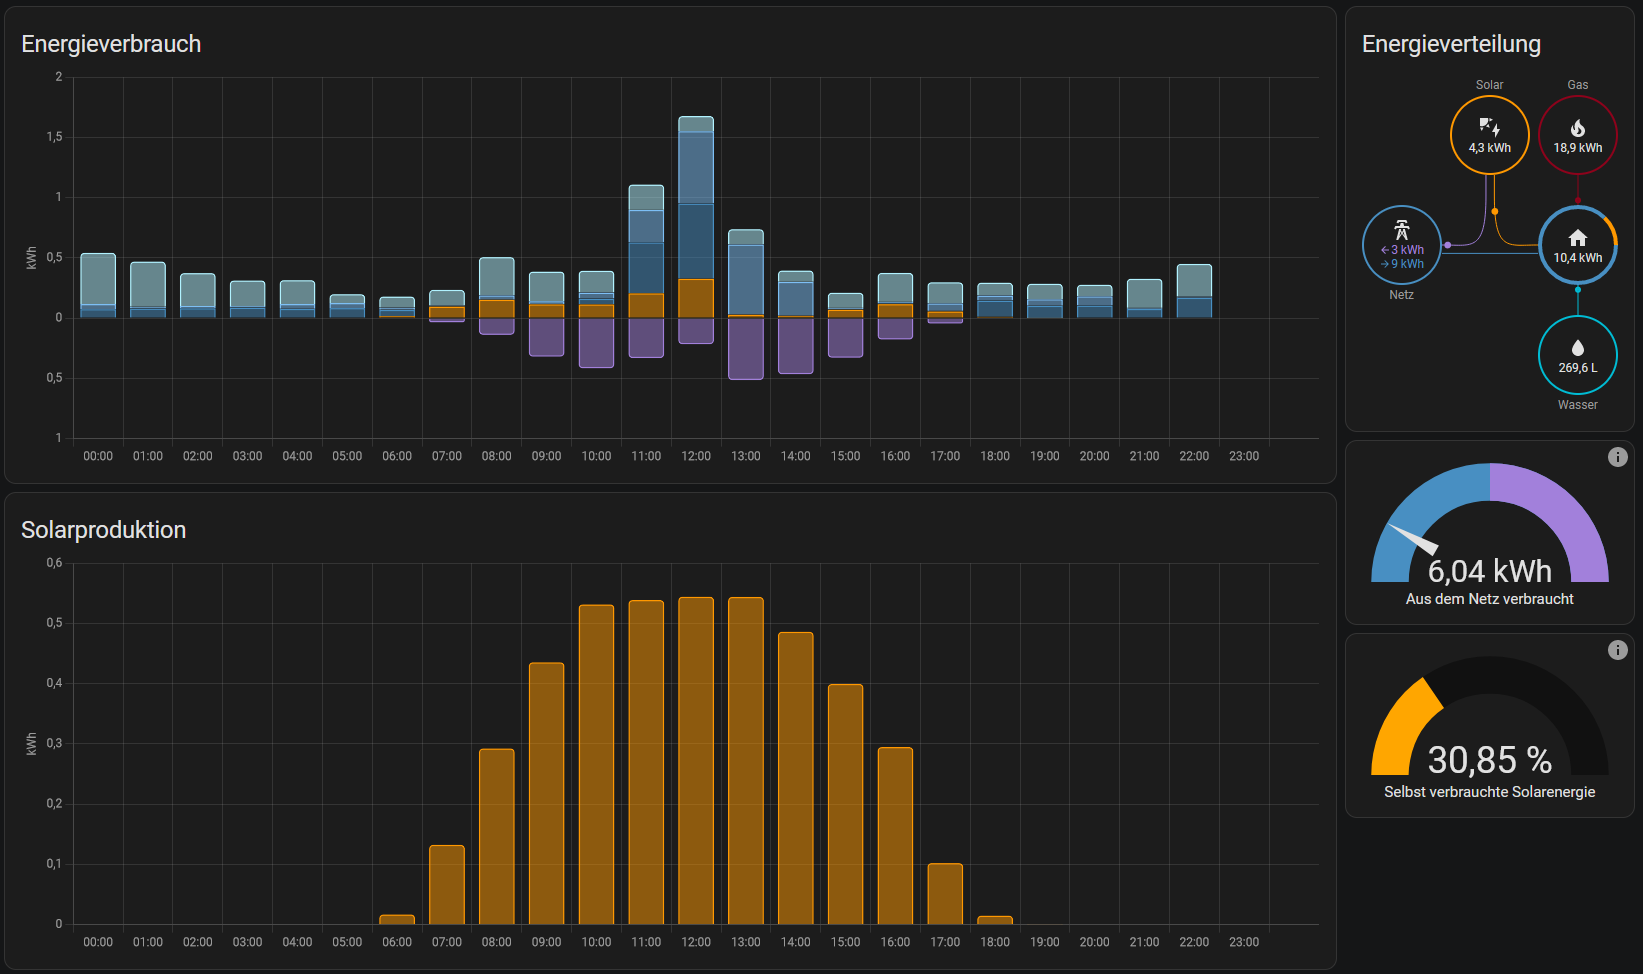
After a few hours, with the ESPHome fork as a great reference, I built a custom firmware for the Vue with Home Assistant support and bilancing counters to properly track how much power you get from the grid and how much you inject back. Tracking all the measurements per phase of course.
While I have still some problems understanding the exact way it measures current and the power in reference to the three phases, I still have some primitive autodetection, trying to find the phase which has the most correlation with the current signal. However the current I measure is sometimes far beyond what the power measurements show. This can not be only due to the power factor. I guess there is a current offset, that would have to be trained as well. But the current measurement isn’t really interesting, so I’d probably skip that.
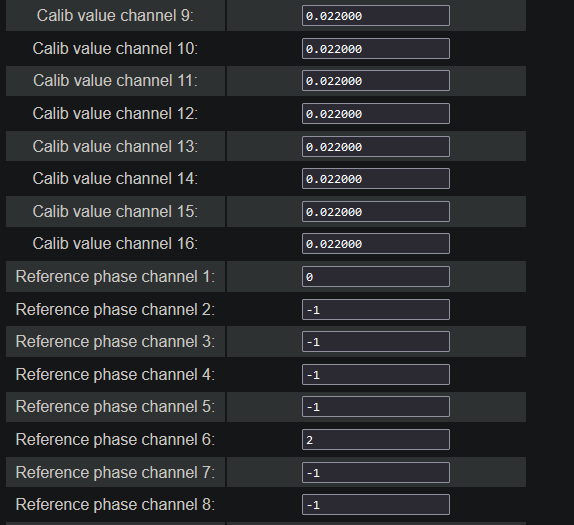
For the case when the autodetection does not reliable detect the right phase – which is ithe case for e.g. solar inverters, driving energy into the grid – you can manually specify the correct phase (0, 1, 2) via the very simple web interface, so there is no doubt we are using the correct values. Init values are -1 for “autodetect”. When in doubt, set manually, which channel is powered by which phase. Plugging in a hairdryer (nearly perfect resistive load) is a good indicator which phase is the right one.
Also the channels names can be configured in the web interface, so they show up in your Home Assistant with that name if you enabled that option. But make sure you do not use any special characters, as they might (actually will…) cause trouble in Home Assistant. Guess I should encode them, but… meh… some other day.
Flashing the firmware from PlatformIO did not work for me. I always got an non-explanatory error when esptool tried to flash the device.
So I ran it manually and that worked. Here is the command i used:
./esptool.py -b 921600 --port /dev/ttyS3 write_flash \
0x1000 ESP32_Vue/.pio/build/VuePower/bootloader.bin \
0x8000 ESP32_Vue/.pio/build/VuePower/partitions.bin \
0xe000 .platformio/packages/framework-arduinoespressif32/tools/partitions/boot_app0.bin \
0x10000 ESP32_Vue/.pio/build/VuePower/firmware.bin
After flashing, the firmware will start an access point with the name esp32-config, waiting for you to connect, open up http://192.168.4.1 and configure WiFi. Then you can configure it from a proper web browser.
Here is the repository: https://github.com/g3gg0/ESP32_VuePower
If you have ideas or fixes, I happily accept pull requests, do not hesitate to contribute!
Related Posts
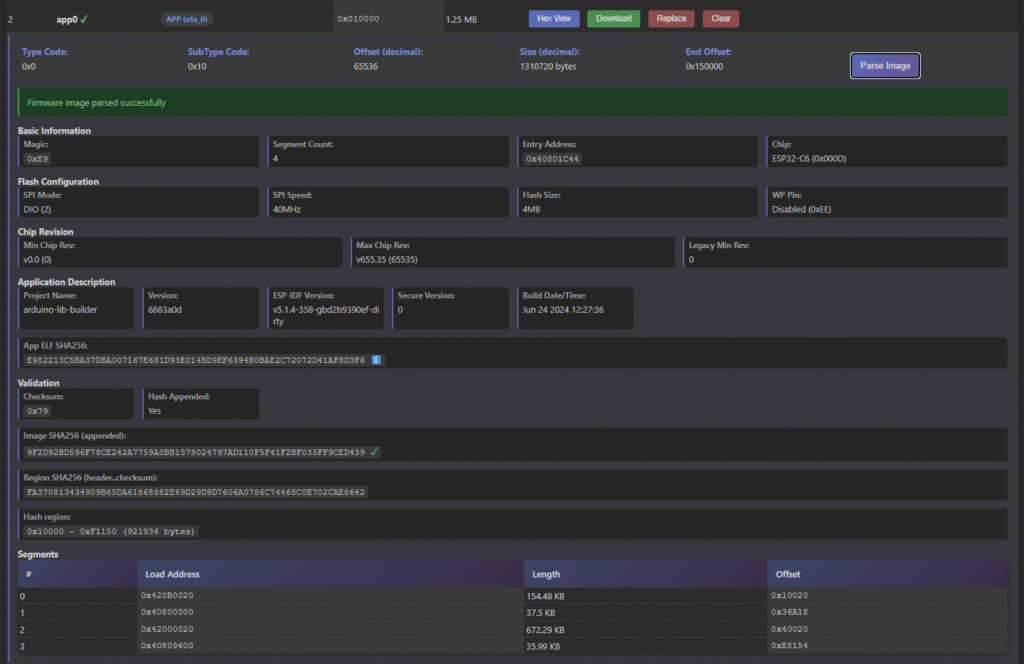
[ESP32] Browser-based firmware image viewer and editor
Dyson v15 Battery Notes