I own FPV goggles from Eachine and have been very happy with them. Yes, you look like an idiot with a brick on your forehead, but the antennas make you look more like a Johnny 5 fan, which is cool again. At least was 3 decades ago. Don’t worry, these FPV quads are flown in areas where you are less likely to be seen anyway.
Later I bought some second hand FatShark Dominator v3 goggles.
All the cool guys use them, so they must be a lot better.
Mine came with a Furious FPV True-D diversity VRx module. Man, this all must be a great setup with all the colorful LEDs and OLED thingies.

When first testing the setup, I instantly wanted my EV800 goggles back. While the strap keeps the goggles tight on your head and the much lighter – and especially shorter – setup feels a lot more comfortable, the screen size looks more like a tamagochi. The FOV of 30° diagonal compared to the 140°/120° (h/v) of the EV800.
Not doing maths here, but you can compare it like watching a movie on your 70″ TV versus on you mobile phone. It works. But meh.
So I wanted to add support for the FatShark receiver modules and a mini DVR to the EV800, so I could combine the best of both worlds.
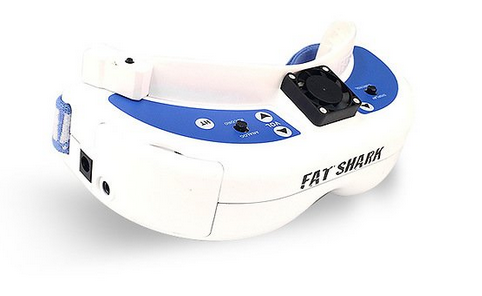
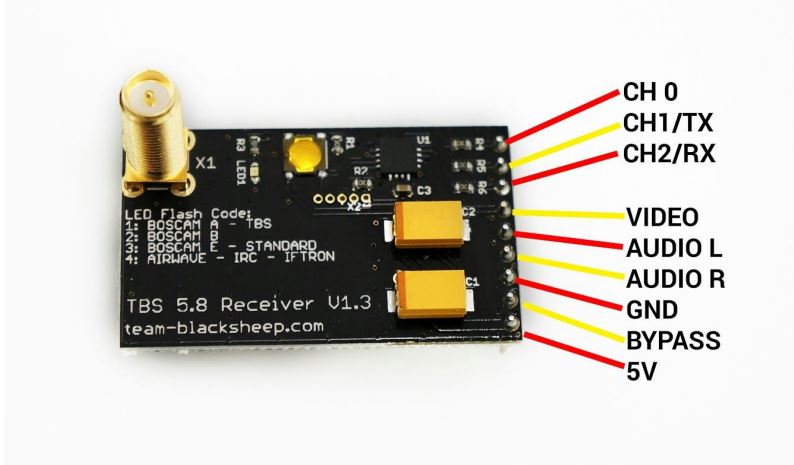
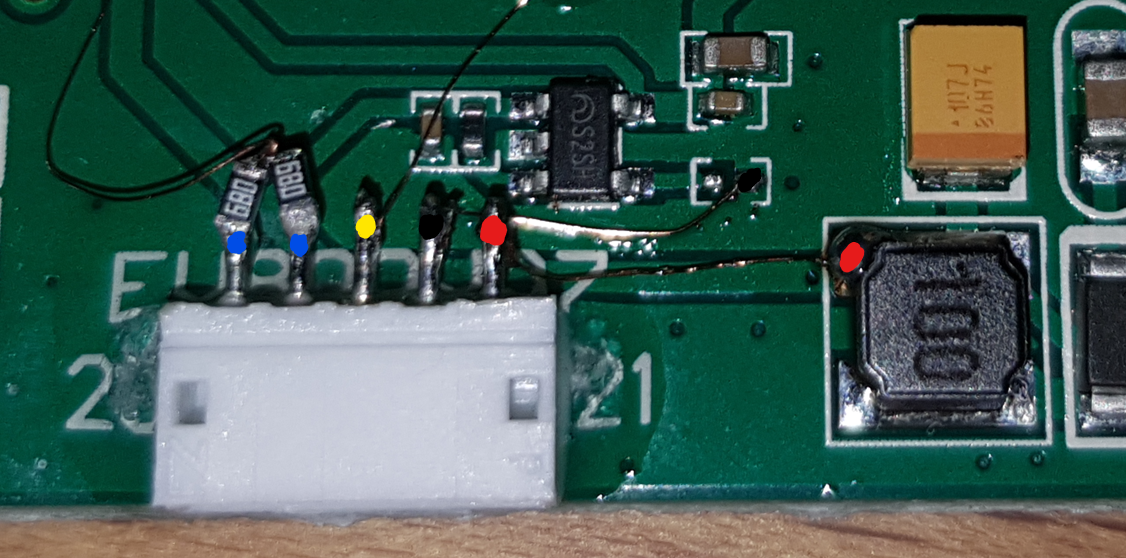
The first step was designing a mount in which I can plug the receiver module into. No photos of the wiring here – have a video instead. I just placed a 2.54mm female header in the slot you can see, looked up some images on the interwebs on what the pinout is here and soldered a pre-crimped 5-pin JST with wires there.
Then added a mating JST pin header to the board using super glue and some UV curing resin.

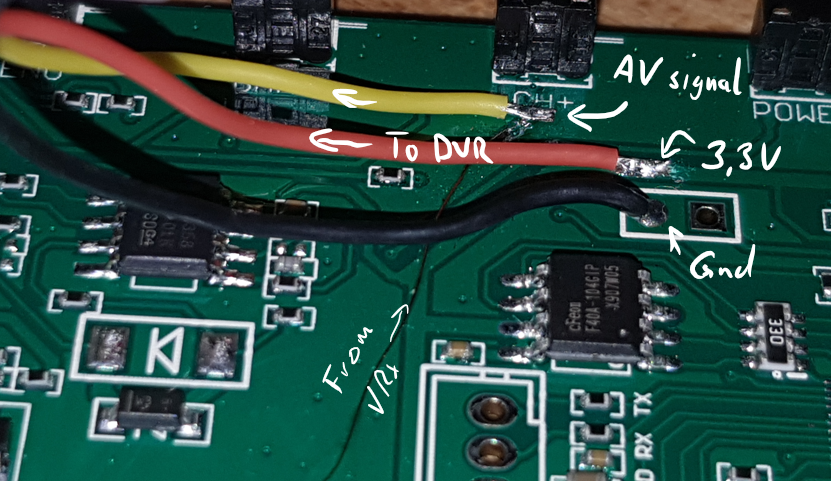
The video signal is fed into the AV input line, so I can easily switch between onboard VRx and the FatShark bay module by pressing one button on the EV800.
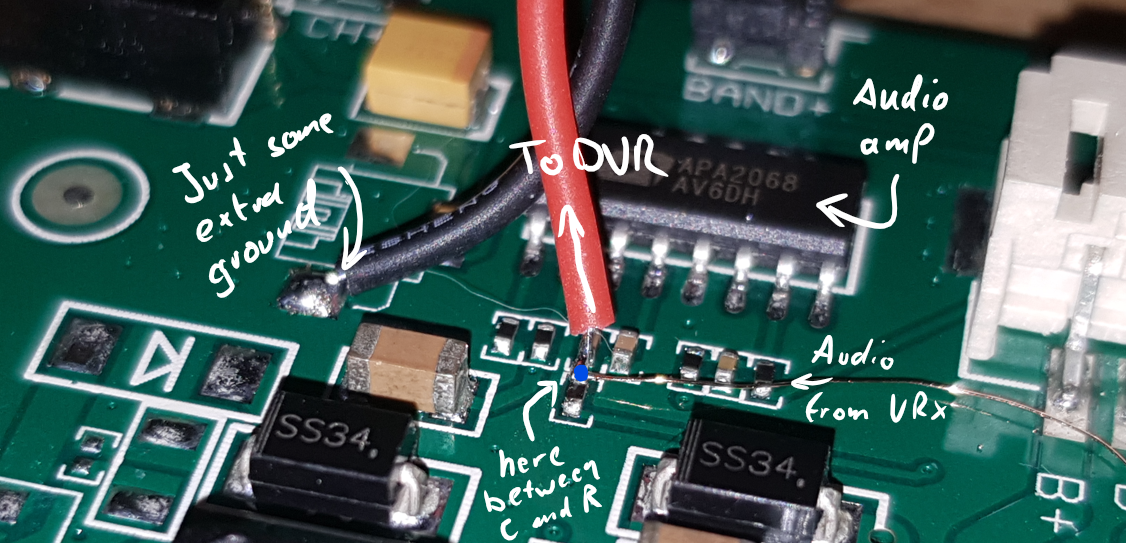
For the audio lines you will notice that I added two 68 Ohm resistors before combining L and R channel – this is to divide down the voltages and prevent short circuiting the outputs of the FatShark VRx module and the output of the onboard VRx. This seems still too much amplitude for the DVR module – audio is overdriven far too much. Next time I open the forehead-brick, I will add an extra resistor to ground.
Speaking of that, I did not check if the audio output of the onboard VRx is shut down when switching to AV. Maybe it feeds some white noise into the amp, causing my overdriven audio issue. Will have it check that, too.
Edit: Indeed the onboard VRx was feeding noise into the amp and DVR. Just removing the small resistor below where you tap audio is enough.
Of course I removed the battery from the EV800 to save weight and placed a high quality, premium step down converter which gets its power from an XT30 connector I placed on the right side of the goggles and converts that down to 4.2V. This also gives me more options regarding powering the goggles and no special charger wire etc.
Maybe this information is helpful for someone, so I decided to share it.
Related Posts